Tuesday, June 14, 2016

Cheap IBL + reflections test

Quick post showing a quick WIP of a cheap all realtime IBL + reflections solution for my VR engine.  Nothing really fancy to show here except that the project is still going.  It's kind of annoying having to manually index and project for a linear cubemap format too.  I may do a pass to convert to lat + long to reduce maps and sampling a la GTA later too.  Right now the next step is to do importance sampling reference in realtime before going too far into screen space ray tracing and compute maddness.  I also added support for 'metalness' materials back for this scene.  It might be worth looking into a metalness only pipeline or even deferred texturing for VR just for GBuffer reduction to help aging GPUs.  The annoying part is this scene is all one FBX, so I ended up fixing some FBX compiler issues with per polygon materials not cooking properly.  I think it ends up being quite a bit of submeshes without instancing.

Looking into GI and related features next most likely if not SDFs for fluids and shadows or finishing up the OIT system for more than fluids.

Indirect Lighting ON
Direct Lighting ON
Reflections ON
Direct Lighting ON
Indirect Lighting ON
Reflections OFF
Indirect Lighting ON
Direct Lighting OFF
Reflections OFF

Monday, May 16, 2016

SteamVR (beta) under Linux

Update 20160523
Forgot to update this at the end of the week.  Busy with work.  :)

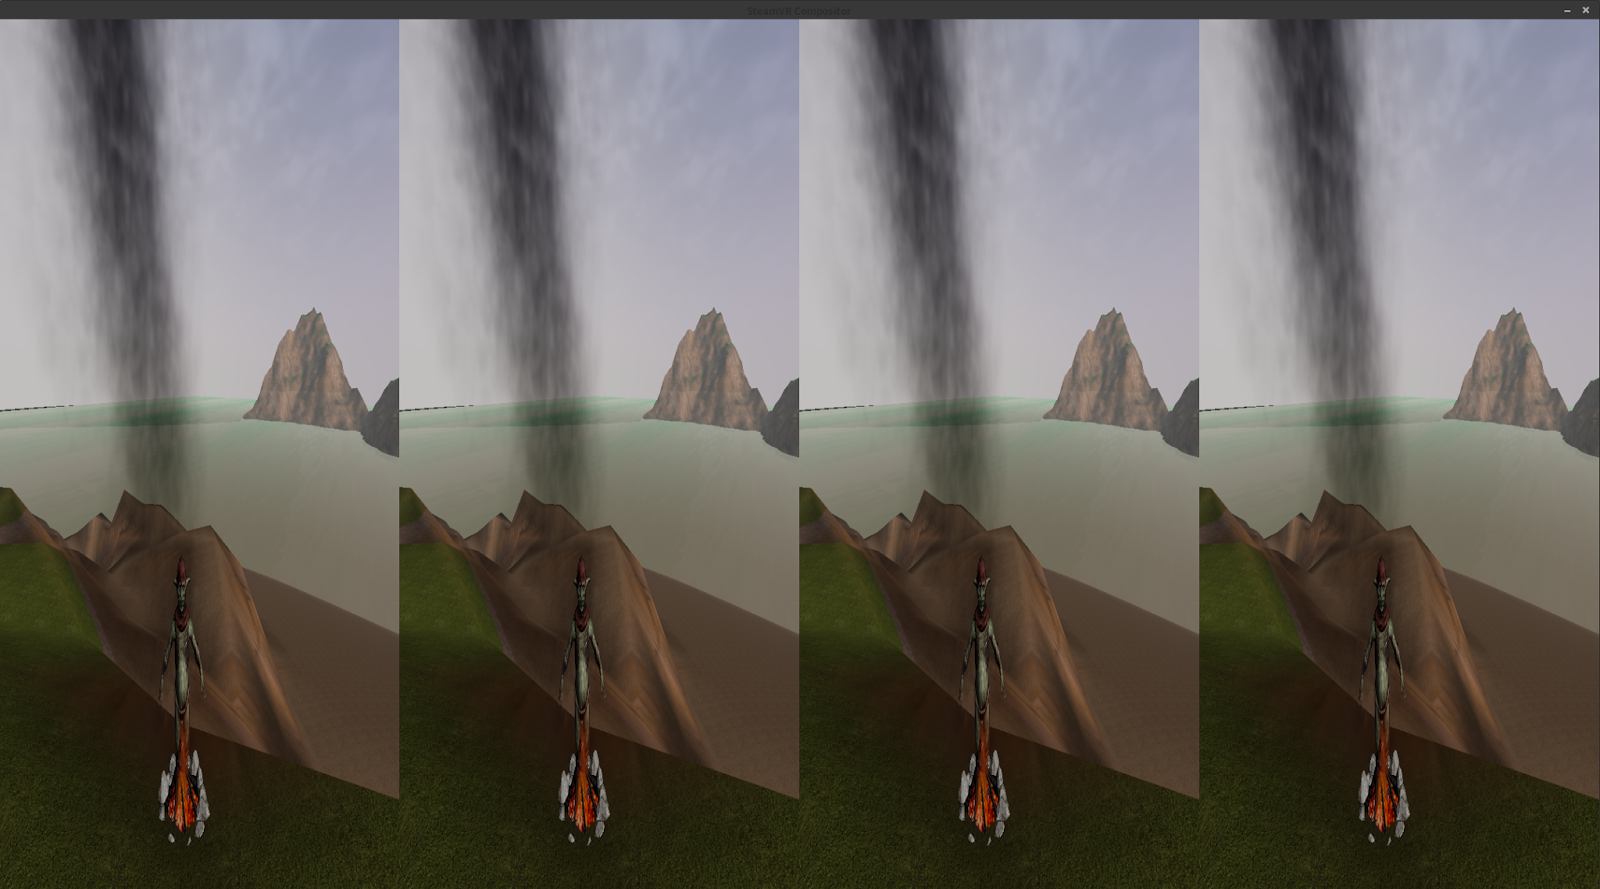
Turns out I needed to kick the compositor right after submitting both texture refs ( I output a single target, but it updates in one pass instead of two ).  After that I don't have Dutch orange as a background anymore.  I should also clarify that my demo doesn't need any user setup to run with Vive at all once the driver config steps are done once.  Unlike ye olde DK2 setup where you need to HUP the ovr daemon, or older SteamVr vrserver --keepalive.

Sadly as noted before the UV support for single target appears to not work under Linux SteamVR in the sense it applies the values incorrectly by splitting the single target twice.  The same test in Windows SteamVR outputs as expected.  Also the SteamVR compositor tends to have a window title as well.  I could likely hack around the title issue using a WM hint mutation program like DevilsPie2 for GNOME if needed.


It almost works, rendering and compositing anyway...
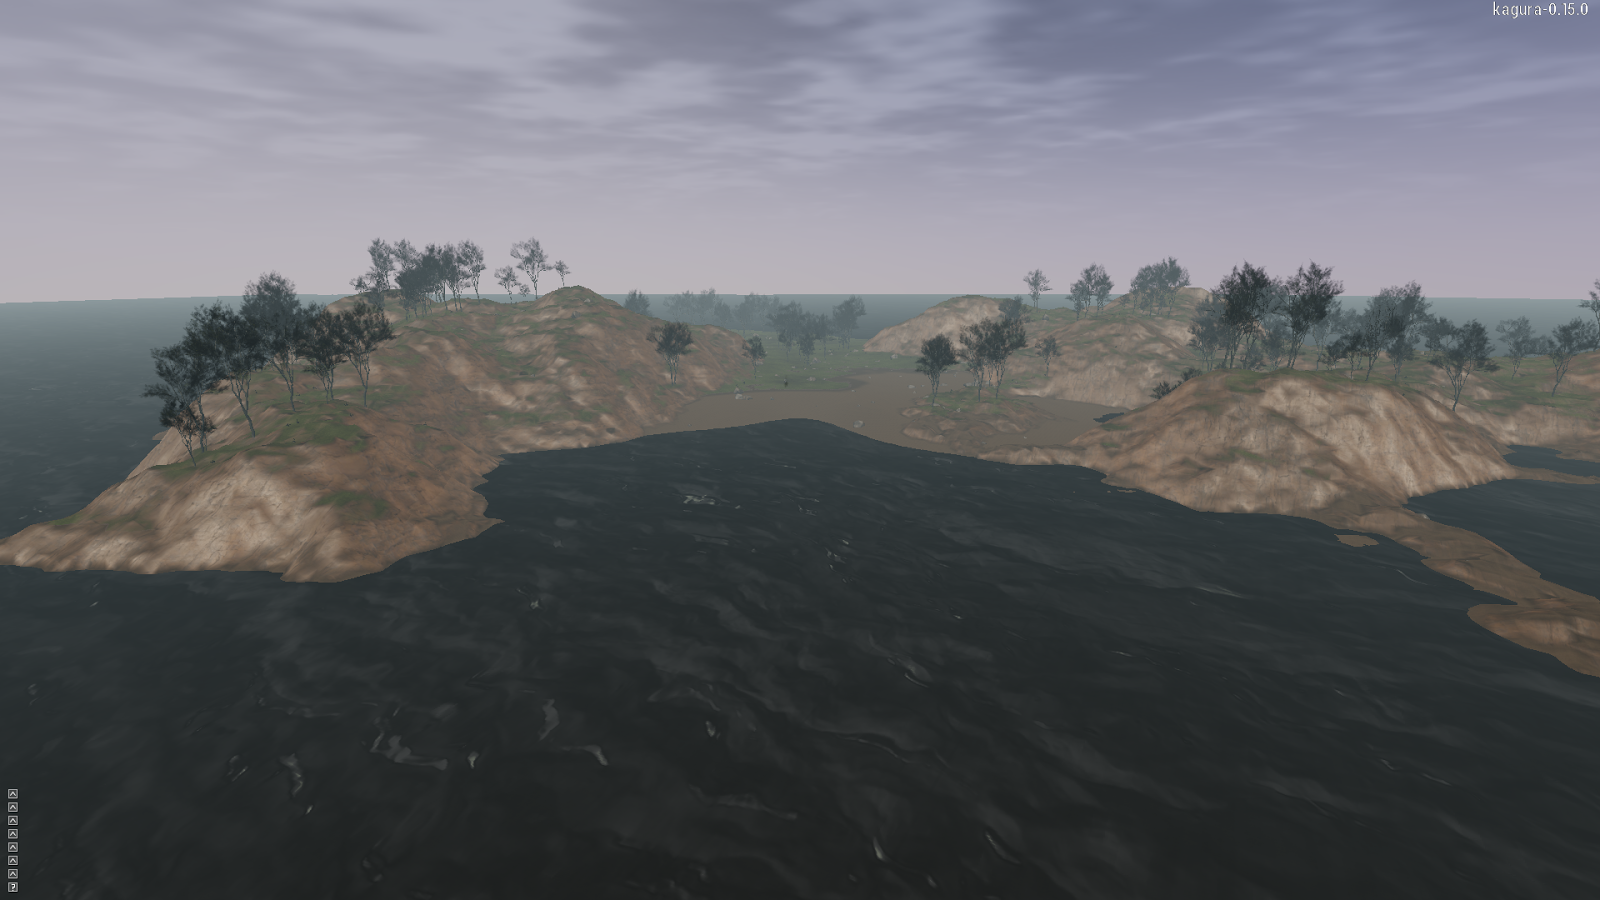
For the curious this is as far as I got SteamVR ( beta ) and hellovr running under Linux at present.  This is using my fork of OpenVR.


Right now my game is just drawing orange to the compositor, so stay tuned.  I might hack it up this week if I get enough time.  Before this was all extended mode hacks under Linux.  :3


Poorly written up dump of what I had to do to get beta running
Shared in the hopes it helps someone.  I'm not sure why I had to manually create json files and add paths, so beware only tested on my box.  Also I may have forgot some change I did locally.  :3

If you're using my OpenVR fork remember hellovr searches for the PNG in the '..' path.  Also note if you copy your lighthousedb.json files from a Windows machine they should auto downgrade to the older SteamVR version.  I didn't do an strace to see if some files such as chaperone_info.vrchap are even read, but be aware they exist on Windows SteamVR.

Lib path


export LD_LIBRARY_PATH=$LD_LIBRARY_PATH:/home/thendrix/Steam/SteamApps/common/SteamVR/bin/linux64:/home/thendrix/Steam/SteamApps/common/SteamVR/drivers/lighthouse/bin/linux64

USB permissions

sudo chmod a+rw /dev/hidraw*

Steam/config/streamvr.vrsettings - ( May need to comment out bodys if this fails )
{
   "jsonid" : "vrsettings",
   "steamvr" : {
     // "automaticDirectModeEnabled" : true,
     // "requestDirectModeDisabled" : false,
     // "requestDirectModeEnabled" : false,
  "ipd": 0.0635,
  "forcedDriver": "lighthouse",
  "forcedHmd": "",
  "requireHmd": true,
  "displayDebug": false,
  "enableDistortion": true,
  "displayDebugX": 0,
  "displayDebugY": 0, 
  "sendSystemButtonToAllApps": false,
  "loglevel": 3
  "background": "backgrounds/image_%d.png"
 },
   "driver_lighthouse": {
   "disableimu": false,
   "usedisambiguation": "tdm",
   "disambiguationdebug": 0,
   "primarybasestation": 0,
   "lighthousename": "",
   "maxincidenceangledegrees": 60.0,
   "uselighthousedirect": true,
   "dbhistory": false,
   "originoffsetx": 0.0,
   "originoffsety": 1.0,
   "originoffsetz": 0.0,
   "headingoffset": 0.0,
 },
   "driver_null" : {
  // drivers are searched in alphabetical order, so you may need steamvr.forcedDriver="null" as well
  "enable": true,
  "id": "Null Driver",
  "serialNumber": "Null 4711",
  "modelNumber": "Null Model Number",
  "windowX": 100,
  "windowY": 100,
  "windowWidth": 1920,
  "windowHeight": 1080,
  "renderWidth": 1344,
  "renderHeight": 1512,
  "secondsFromVsyncToPhotons": 0.1,
  "displayFrequency": 90
   },
   "version" : "1"
}


Path registry setup
thendrix@xenophon ~/Steam/SteamApps/common/SteamVR/bin/linux64 $ ./vrpathreg --help
Commands:
  show - Display the current paths
  setruntime <path> - Sets the runtime path
  setthis - Sets the runtime path to the runtime that vrpathreg lives in
  setconfig  - Sets the config path
  setlog  - Sets the log path
  adddriver  - Adds an external driver
  removedriver  - Removes an external driver

...

thendrix@xenophon ~/Steam/SteamApps/common/SteamVR/bin/linux64 $ ./vrpathreg
Runtime path = /home/thendrix/Steam/SteamApps/common/SteamVR/
Config path = /home/thendrix/Steam/config/
Log path = /home/thendrix/Steam/logs

Linux OpenVR hacks

After trolling the steam forums a few days ago with this:
https://plus.google.com/+TerryHendrixII/posts/F6PR4mprHrD

I notice this today:
http://www.vronlinux.com/articles/adventures-with-openvr-and-the-vive-on-linux.8


Hopefully have an update at the end of the week.  :)

First time I tested on an HMD in a while, and I notice the new deferred water isn't setup correctly.  Pretty handy to have a dynamic RT browser.

Bonus for those wondering there is a branchless way to do screen-space pass UVs for single target + serialized | two target parallel.  Blogger makes it painful to post source... sorry if it screws it up after I hit update.  :)


out vec2 v_Texcoord;

void main()
{
    // Fullscreen clipped triangle.
    int x = ( gl_VertexID << 1 ) & 2;
    int y =  gl_VertexID & 2;
    v_Texcoord = vec2( x, y );
    gl_Position = vec4( v_Texcoord * vec2( 2.0, 2.0 ) + vec2( -1.0, -1.0 ), 0.0, 1.0 );


    // Monoscopic : 2.0, RightEye : 1.0, LeftEye : 0.0
    // { scale = 1, offset = 0 }; { scale = 0.5, offset = 0.5 }; { scale = 0.5, offset = 0.0 }
    int i = int(floor( _Eye )) >> 1; 
    float stereo = 1.0 - i;
    float scale = 1.0 - 0.5 * stereo;
    float offset = 0.5 * _Eye * stereo;
    v_Texcoord.x = v_Texcoord.x * scale + offset;
}

Sunday, May 15, 2016

Hhmm... oh yeah

I switched over to IMGUI a while back for a debug UI.  Currently I have an accordion-style property editor w/ inline material editing et al.  Not as fully featured as the HTML interface, but easier for blokes with just laptops.  :3


Saturday, January 30, 2016

Noise!

Update: Screenshots with realistic sized trees on same terrain, and fixed some links.  :3


Tree scale now in 10-20m range.


I noticed r/proceduralgeneration has a lot activity lately, so I thought I would do quick post on how I'm generating my current test islands with only 4 functions.  This is what they typically look like:

Terrain generated by simple density function.

Terrian Geometry
I basically use both 2d and 3d simplex noise to add and subtract a global density function, which is described per terrain cube.  You can stack cubes like octrees, or more typically just a simple XZ grid.  This density function is used to produce voxels, which are then in turn converted to meshes for physics and rendering.  I don't use GPU rendering of the voxels as I need that GPU time for VR.  :3

All of this is done in realtime via the clever use of worker threads with the option to serialize them out as models.  Each cube is typically 256 meters.  Yes, this means if you want really tall mountains you need to stack another layer of cubes on top of your XZ grid.

This listing shows how I build the density function to pass into a now obsolete KaMeshComponent, which will then in turn start deferred creation of the meshes for physics and rendering.  The above island is solely defined as as the global density function:


local density = KaDensity.Create()
KaDensity.Seed( density, 2312.0, 0.0, 561.972 )
KaDensity.AddFractalNoise2d( density, 6, 32.0, 8.0, 0.0, 32.0 )
KaDensity.AddFractalNoise2d( density, 10, 8.0, 8.0, 0.0, 8.0 )
KaDensity.SubFractalNoise2d( density, 10, 64.0, 8.0, 0.0, 6.0 )
KaDensity.AddFractalNoise3d( density, 3, 32.0, 4.5 )

listing 1

Notice there is little use of 3d, as that is more for making hills, caves, rivers, and arches.  Also you could introduce local density for features, but I don't typically do any manual level editing at this point in project.  This is one of my small islands used for testing materials.


Terrian Material
The terrain is composed from a simple triplanar shader.  World height, world slope, and a per pixel Fractal Brownian Motion ( FBM ) to break up the monotony of ground foliage.  There are typically beach sand, dirt, grass ( eg green to brown / height ), and stone generated from this step.  Since you can modify shaders at runtime in kagura this can be fun to improve when you have a few extra minutes in the day.


Terrian Foliage
Once terrain geometry is instanced it will be filled with large vegetation and deco such as bushes and trees to rocks and statues.  For every XY terrain sector I generate a SpawnTracer.  The spawner will 'ping' for the worker threads to be done by ray casting for terrain to appear in its given sector.  Once this is done it issues the given spawn callback.  In this case the callback is a per sector foliage trace driven again by a grid pattern filtered by a tillable FBM ( see old blog post ), slope, height, max per tile count of an object type, and a few other attributes.  This pass handles the case where a house is placed on terrain for example, so it would not put trees and grass on top of it.  It is important to note these happen out of order, and the tiling pattern provided by the FBM is the trick making smooth transitions between tiles possible.

Closer look at the same scene


That's basically how the system works, and it's a little more complex than that but not much.  I'd be happy to answer any questions or take comments.  Here's a script function that creates the entire island above:


function VoxelTerrainComponent.OnCreate( self )
        local sz = self.width
        local hsz = self.height
        local scale = 256.0

        local density = KaDensity.Create()
        KaDensity.Seed( density, 2312.0, 0.0, 561.972 )
        KaDensity.AddFractalNoise2d( density, 6, 32.0, 8.0, 0.0, 32.0 )
        KaDensity.AddFractalNoise2d( density, 10, 8.0, 8.0, 0.0, 8.0 )
        KaDensity.SubFractalNoise2d( density, 10, 64.0, 8.0, 0.0, 6.0 )
        KaDensity.AddFractalNoise3d( density, 3, 32.0, 4.5 )

        for x = -sz, sz do
                for y = 0, hsz do
                        for z = -sz, sz do
                                local name = "VoxelMesh_" .. x .. "_" .. y .. "_" .. z
                                local dump = 'Cache/' .. name .. '.asset'
                                local sector = KaGameObject.New( x * scale, y * scale, z * scale )
                                KaGameObject.SetName( sector, name )
                                KaMeshComponent.CreateFromVoxels( sector, density, dump, self.material, x, y, z )
                                KaGameObject.Finalize( sector )
                                KaGameObject.Hide( sector )
                                KaGameObject.AddChild( self._GameObject, sector )

                                if self.foliage and y == 0.0 then
                                        -- Place spawners and mappers in the middle of the voxel sector.
                                        local offset = scale * 0.5
                                        SpawnByTracePrefabChild( "FoliageSpawner", self._GameObject,
                                                x * scale + offset,
                                                y * scale + scale * 0.75,
                                                z * scale + offset,
                                                -- VoxelSectorFoliageCb )
                                                VoxelSectorFoliageFbmCb )
                                end
                        end
                end
        end
end

listing 2


And here's what you can do with unfiltered 3d noise:


Wednesday, January 27, 2016

Always check visualizations...

You generally don't want collisions much less generate contact points between static objects.   :3


Tuesday, January 26, 2016

Got HMD working again...

Dug my DK2 back out, and got it hooked back up in my engine.  I somehow had emitter simulations run per eye per frame instead of per frame.  Also need to enforce soft particles in VR maybe.  What a productive lunch break.

Mismatched per eye.

Much better.  :3

Double-checked shadows and reflection probe are once per frame. ;3

Update a walk in the woods...


Very Large Area Test.


Same Area in with HMD off vsync'ed  60Hz.

Saturday, January 23, 2016

Animation Curves R Us

Integrated my curves editor into the existing in-game UI.  Now the hard part is not using curves for everything under the sun.  I'm not sure if I want to make a dopesheet et al too as I'm not remaking blender.  Basically for the in-game editing you can click a 'button' to pop open the curve editor for a given curve.  This is also controllable from Lua script and remote HTML / telnet sessions into the game of course.  I'll refine the prototype a bit more with wrapping modes, better UX, et al.

Thursday, January 21, 2016

Everything is better with splines.

Everyone knows I prefer to have my UI in a browser, but I couldn't help myself and started making an in-game viewport spline editor for you kids on laptops.  Not much yet, but I'm tempted to make a full widget set to replace TwAnt.  I'm currently doing batching for all 2d lines, and of course I do width adjustments by their normals for visibility.  You could make fancy AA/feathered lines with more primitives, but this is fine for my current uses.  Always remember LINES primitive has shitty support on AMD, and it looks bad anyway so spare a quad or a couple triangles and do it right.

Playing around with some prototypes in screenshot below:


Greatly improved from earlier today after adding a windowing canvas:


Thursday, January 14, 2016

Import your 3d models into blender from file manager or terminal.

# Simple script to import models from the command line or via "default application".
#
# 1. Copy the next line into something like blender-import.sh
#    /path/to/blender --python /path/to/blender-import.py -- $1
#
# 2. Set as your "default application" to open 3ds, fbx, and obj files.
#   a. Right-click on filename.fbx
#   b. Open With > Other Application...
#   c. Browse to the blender-import.sh in the dialog that pops-up. ( Click folder icon. )
#   d. Click "Set as Default"
#
# 2016.01, thendrix
#
# https://www.blender.org/api/blender_python_api_2_76b_release/bpy.ops.import_scene.html
#

import bpy, sys
if sys.argv[-1].lower().endswith( ".3ds" ):
        bpy.ops.import_scene.autodesk_3ds(filepath=sys.argv[-1])

elif sys.argv[-1].lower().endswith( ".fbx" ):
        bpy.ops.import_scene.fbx(filepath=sys.argv[-1])

elif sys.argv[-1].lower().endswith( ".obj" ):
        bpy.ops.import_scene.obj(filepath=sys.argv[-1])

Fun continues

Got ye olde particle system back up this week, and while laying the groundwork for a new animation system finally looking into "real" curve editors to drive animations of all types.  Here's some screenshots of a material testing as I reworked a few materials and shaders in-between the engine updates.


Since I'm still not doing a real-time probe you can see artifacts from the fallback "skylight", such as the bright blue reflection in the eyes here.


Friday, January 8, 2016

Ambient Occlusion Test

Hooked up AO for the test character I barrowed, and fixed a few material issues.  Visualization of AO affecting the fallback skylight on the left, and AO off on the right.  The final image is with AO on both sides.  I like to do a lot of material testing with a simple directional light shader like this as I can reload shaders via the HTTP interface in my engine, and it will back prop changes to materials as needed as well.  Fast iteration!

AO visualization, left: on, right: off

left: on, right: off

Normal AO on

Here's the in-game G-Buffer visualization, and note I only clear parts of my MRT as I stencil out non-deffered in the geometry pass.  That's why you see the wavey lines on some visualizations.

Wednesday, January 6, 2016

FBX support almost finished

Migrating away from md5mesh to FBX, since that's the standard as far as content folks are concerned.  Loaded up some models from the Unity 3d asset store, so I can compare lighting!  Just had to hook up the textures in my JSON based materials.  It really shows how much I need to implement IBL and reflection comparing output.  I've been thinking about copying the Witcher 3 idea of a simple low-resolution cubemap camera that is indoor/outdoor aware for a fully dynamic probe as all my stuff is randomly generated you can't bake it unless you save seeds.

Working on procedural animation and an all new animation state system currently, so no pretty lighting for a while.  Just using a simple 'skylight' hack in the meantime.  BTW the FbxSdk for Linux works pretty well, which is nice as I didn't have to make a reverse engineered importer just for this.


Note all these are using faked IBL without AO and no shadows to see the difference better.  I'm not saying the implementations are 100% either.  :D

Here's what it looks like with a Beckman Specular BRDF, and minor GBuffer shader tweaks -- similar to the Order 1886:


Burley aka "Disney" -- similar to UE4:


"Kagura Default" which is a GGX + Normalized Oren-Nayar -- similar to Deep-Down reveal:


Beckman + Oren-Nayar vs GGX + Oren-Nayar with paused camera ( for use with photoshop )


Saturday, January 2, 2016

Nah... let's fix bugs first.

Update, fixed some materials on the horse after some more lighting work... of course:


It helps when more systems match the same coord system and lighting direction...

I can see my house from here... if you look close you can see a 3px tall horse...
He looks like this...

Old asset test for fun...